Institution Registration and Account Management
The Institution Registration process allows organizations such as hospitals, clinics, and pharmacies to create accounts within the MSO System. When an institution registers, both an institution record and a Requester (Coordinator) account are automatically created and linked together.
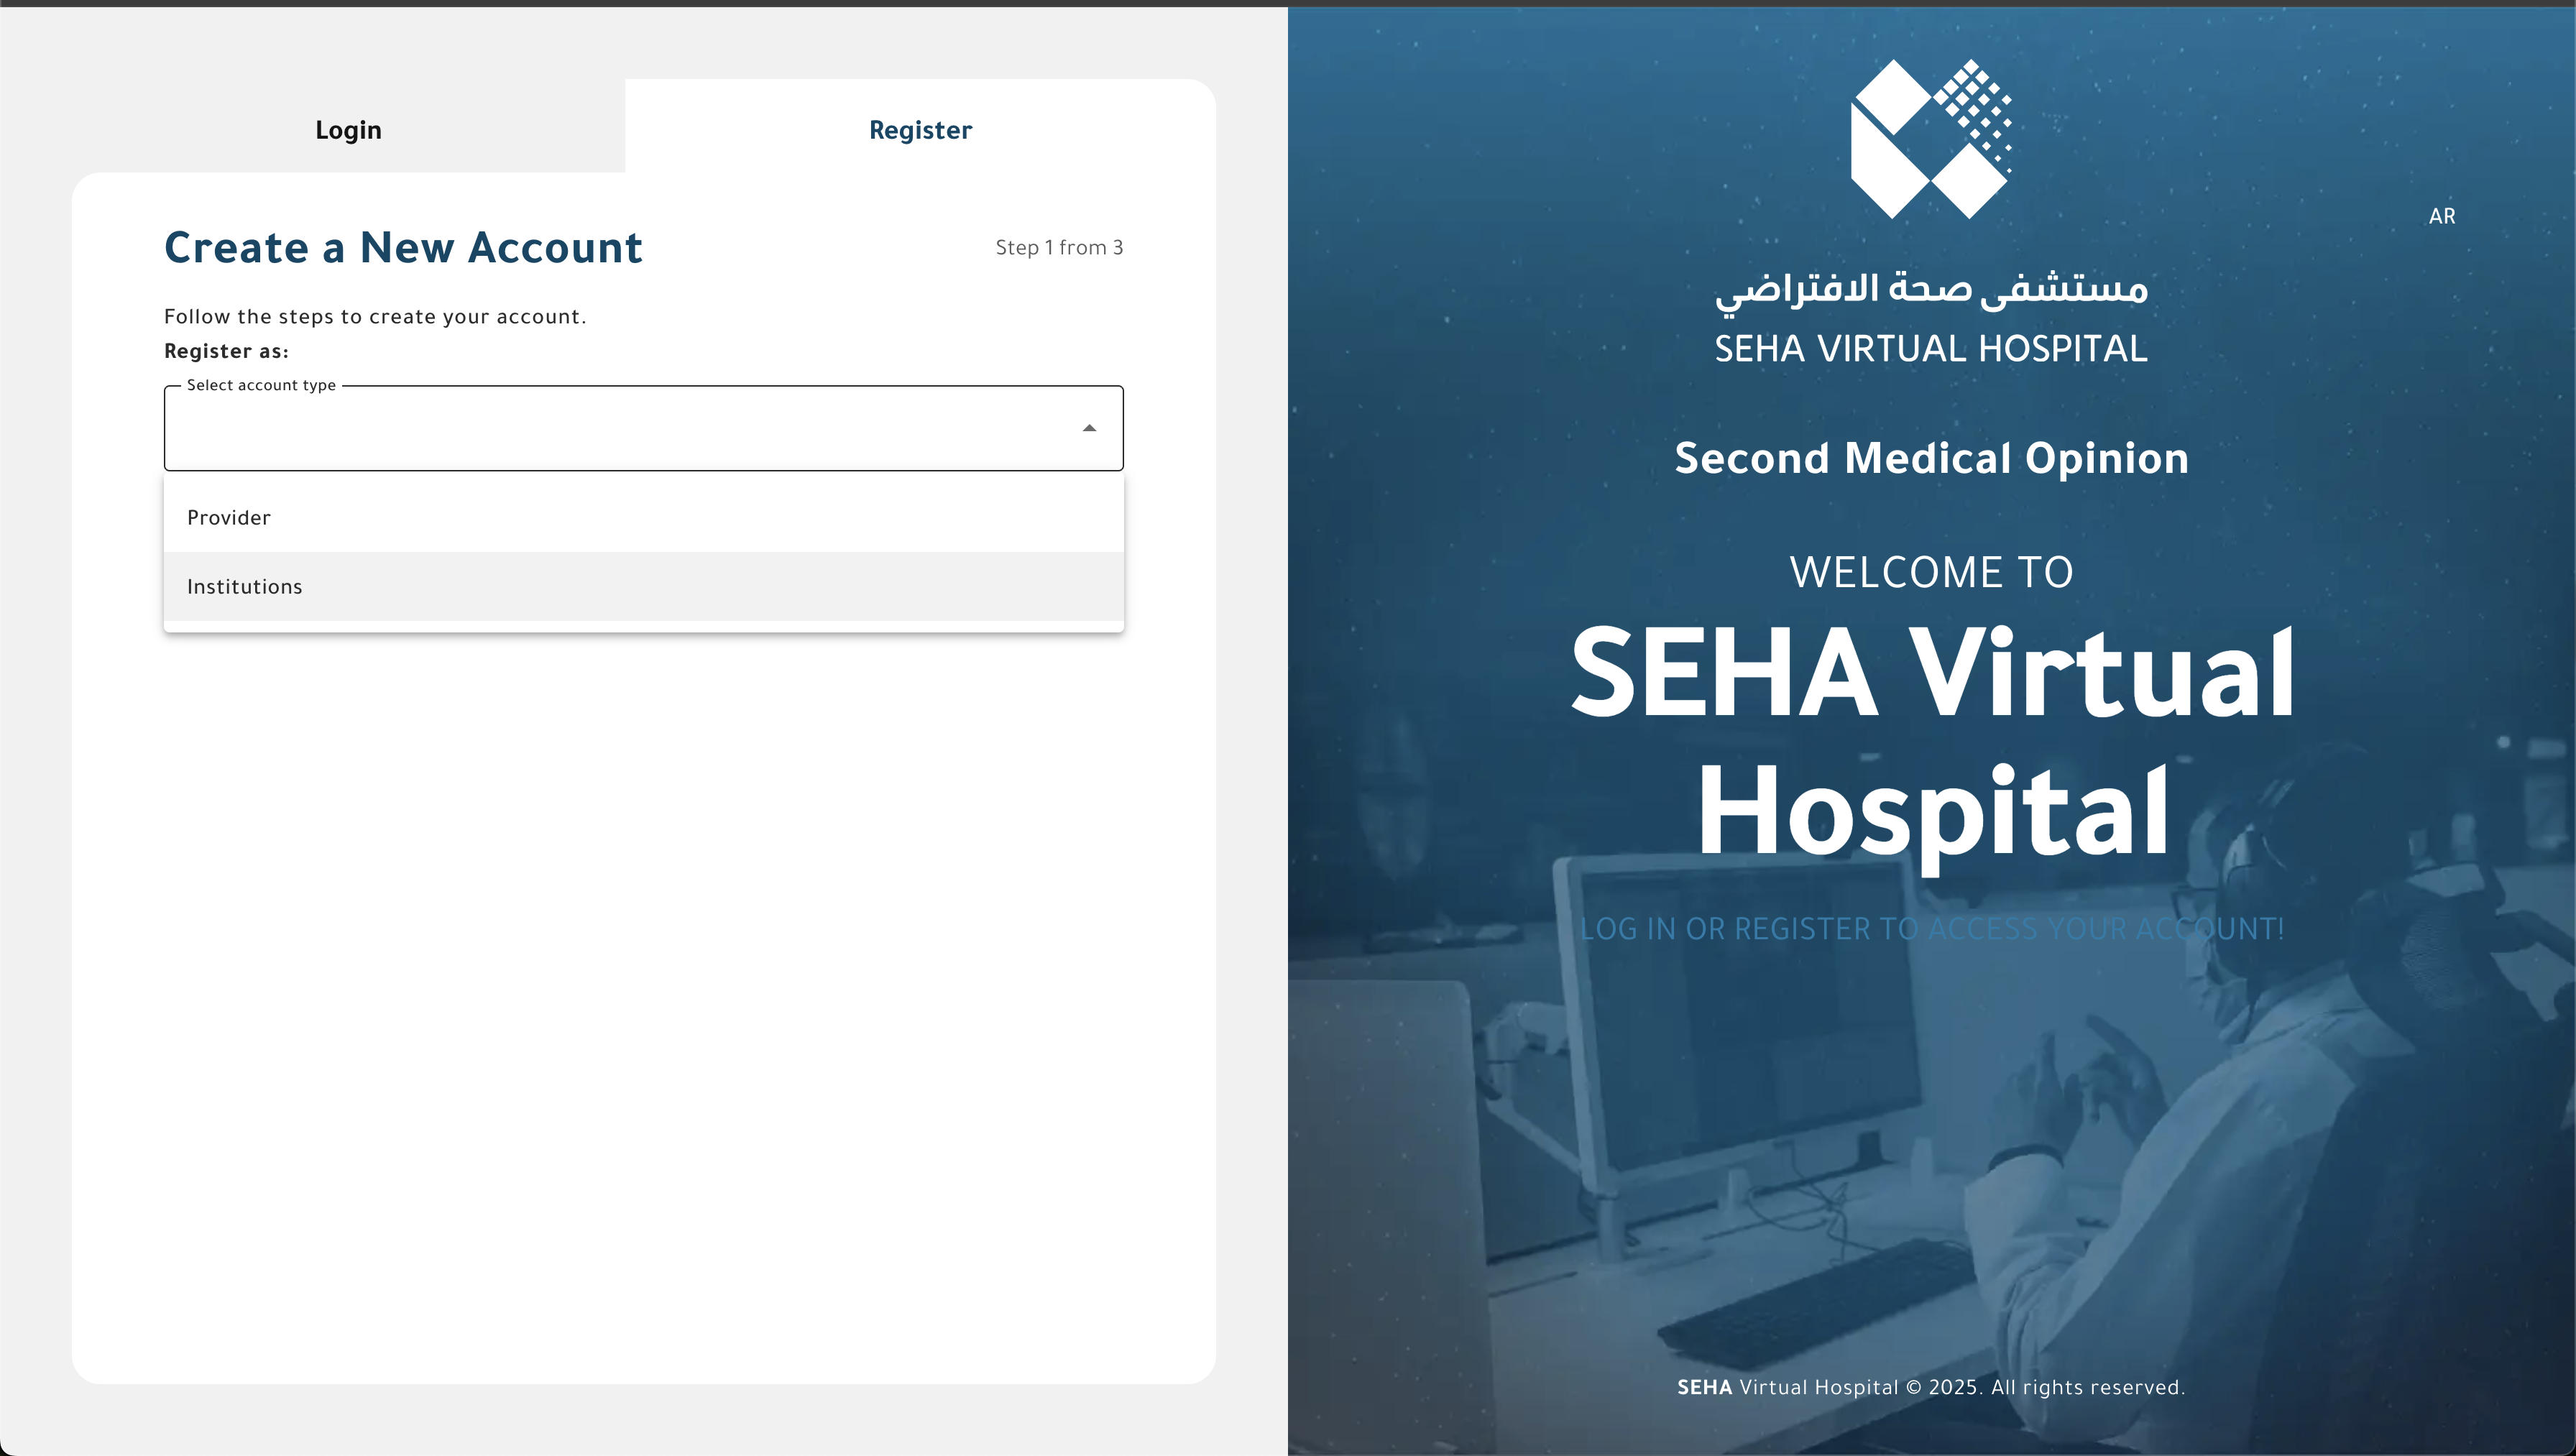
Institution Registration Steps
- On the Login page, click the Register tab.
- From the Account Type dropdown menu, select Institution.
- The Institution Registration Form will appear.
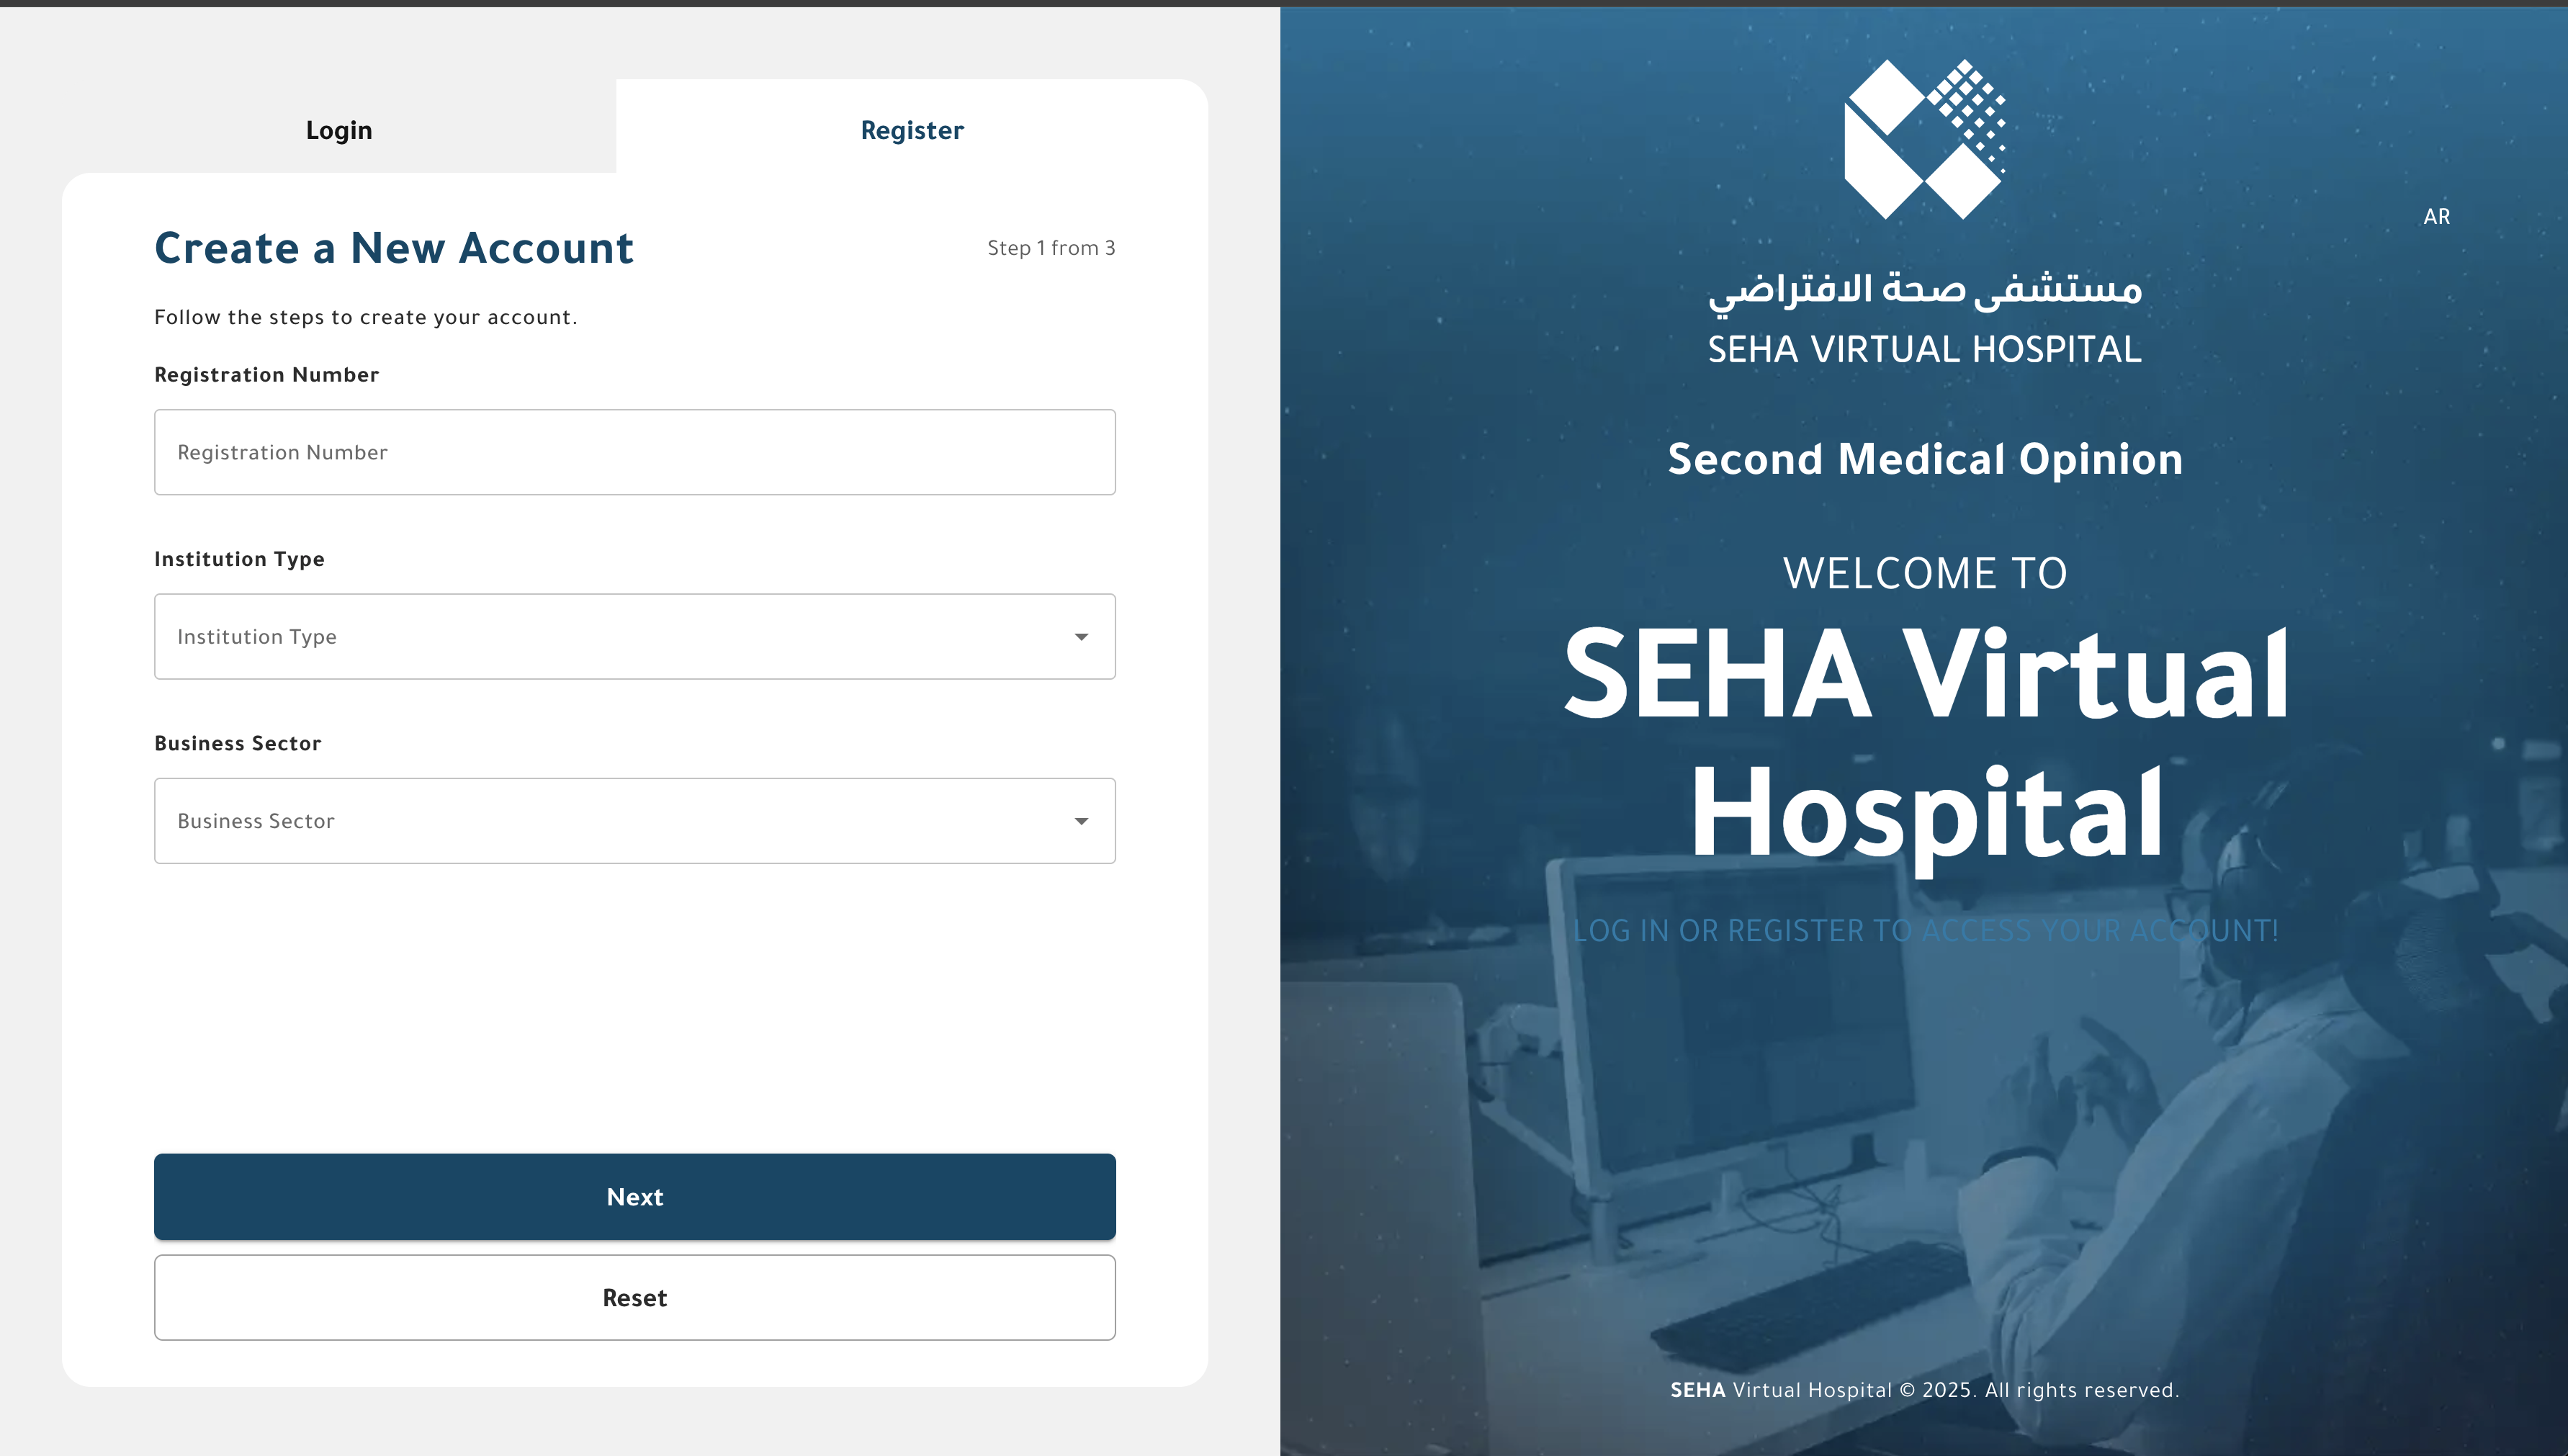
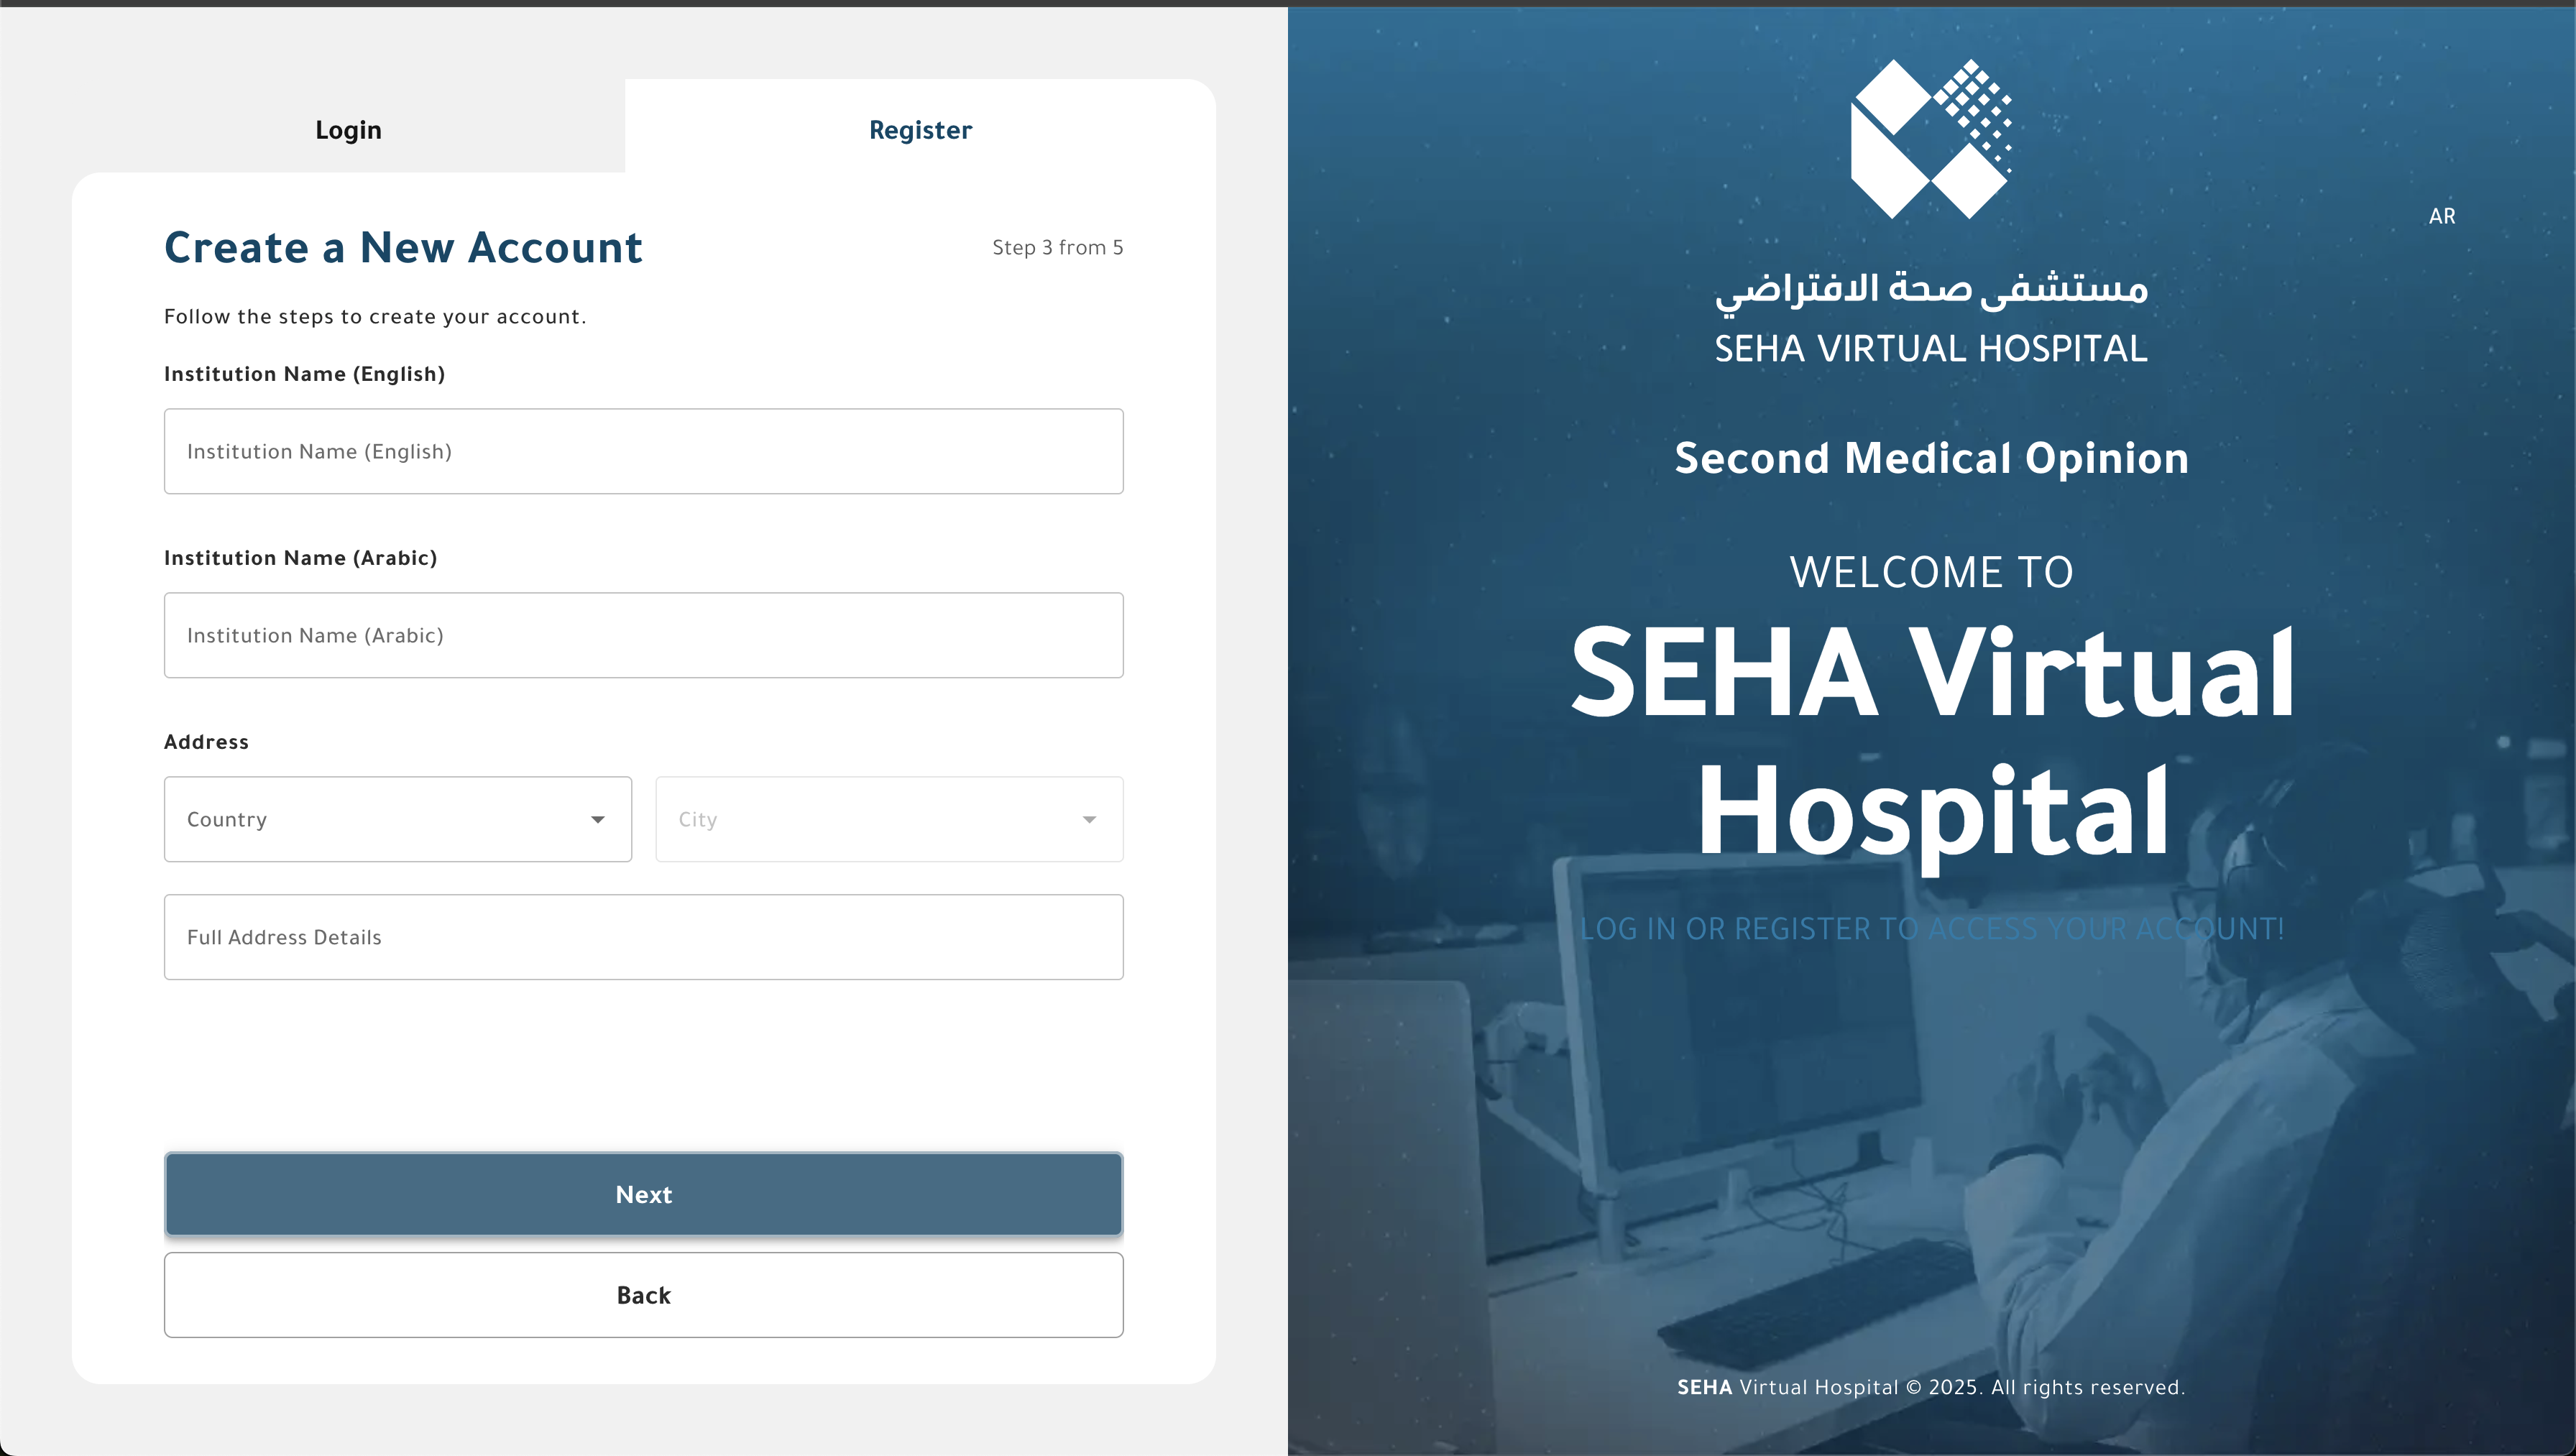
Institution Information Fields
| Field | Required | Description |
|---|---|---|
| Registration Number | ✅ | Official registration or license number of the institution. |
| Institution Type | ✅ | Choose one of: Hospital, Clinic, or Pharmacy. |
| Business Sector | ✅ | Choose one of: Primary Care, Secondary Care, or Diagnostic. |
| Institution Logo | ✅ | Upload a valid image file representing the institution logo. |
| Institution License | ✅ | Upload a valid license file for verification. |
| Phone Number | Optional | Institution’s official contact phone number. |
| Institution Name (Arabic) | ✅ | Official institution name in Arabic. |
| Institution Name (English) | ✅ | Official institution name in English. |
| Country | Optional | Select the country where the institution operates. |
| City | Optional | Select the institution’s city. |
| Full Address | Optional | Add detailed address information. |
Once all required fields are completed, click Next to proceed to Requester Account Registration.
Example Interface

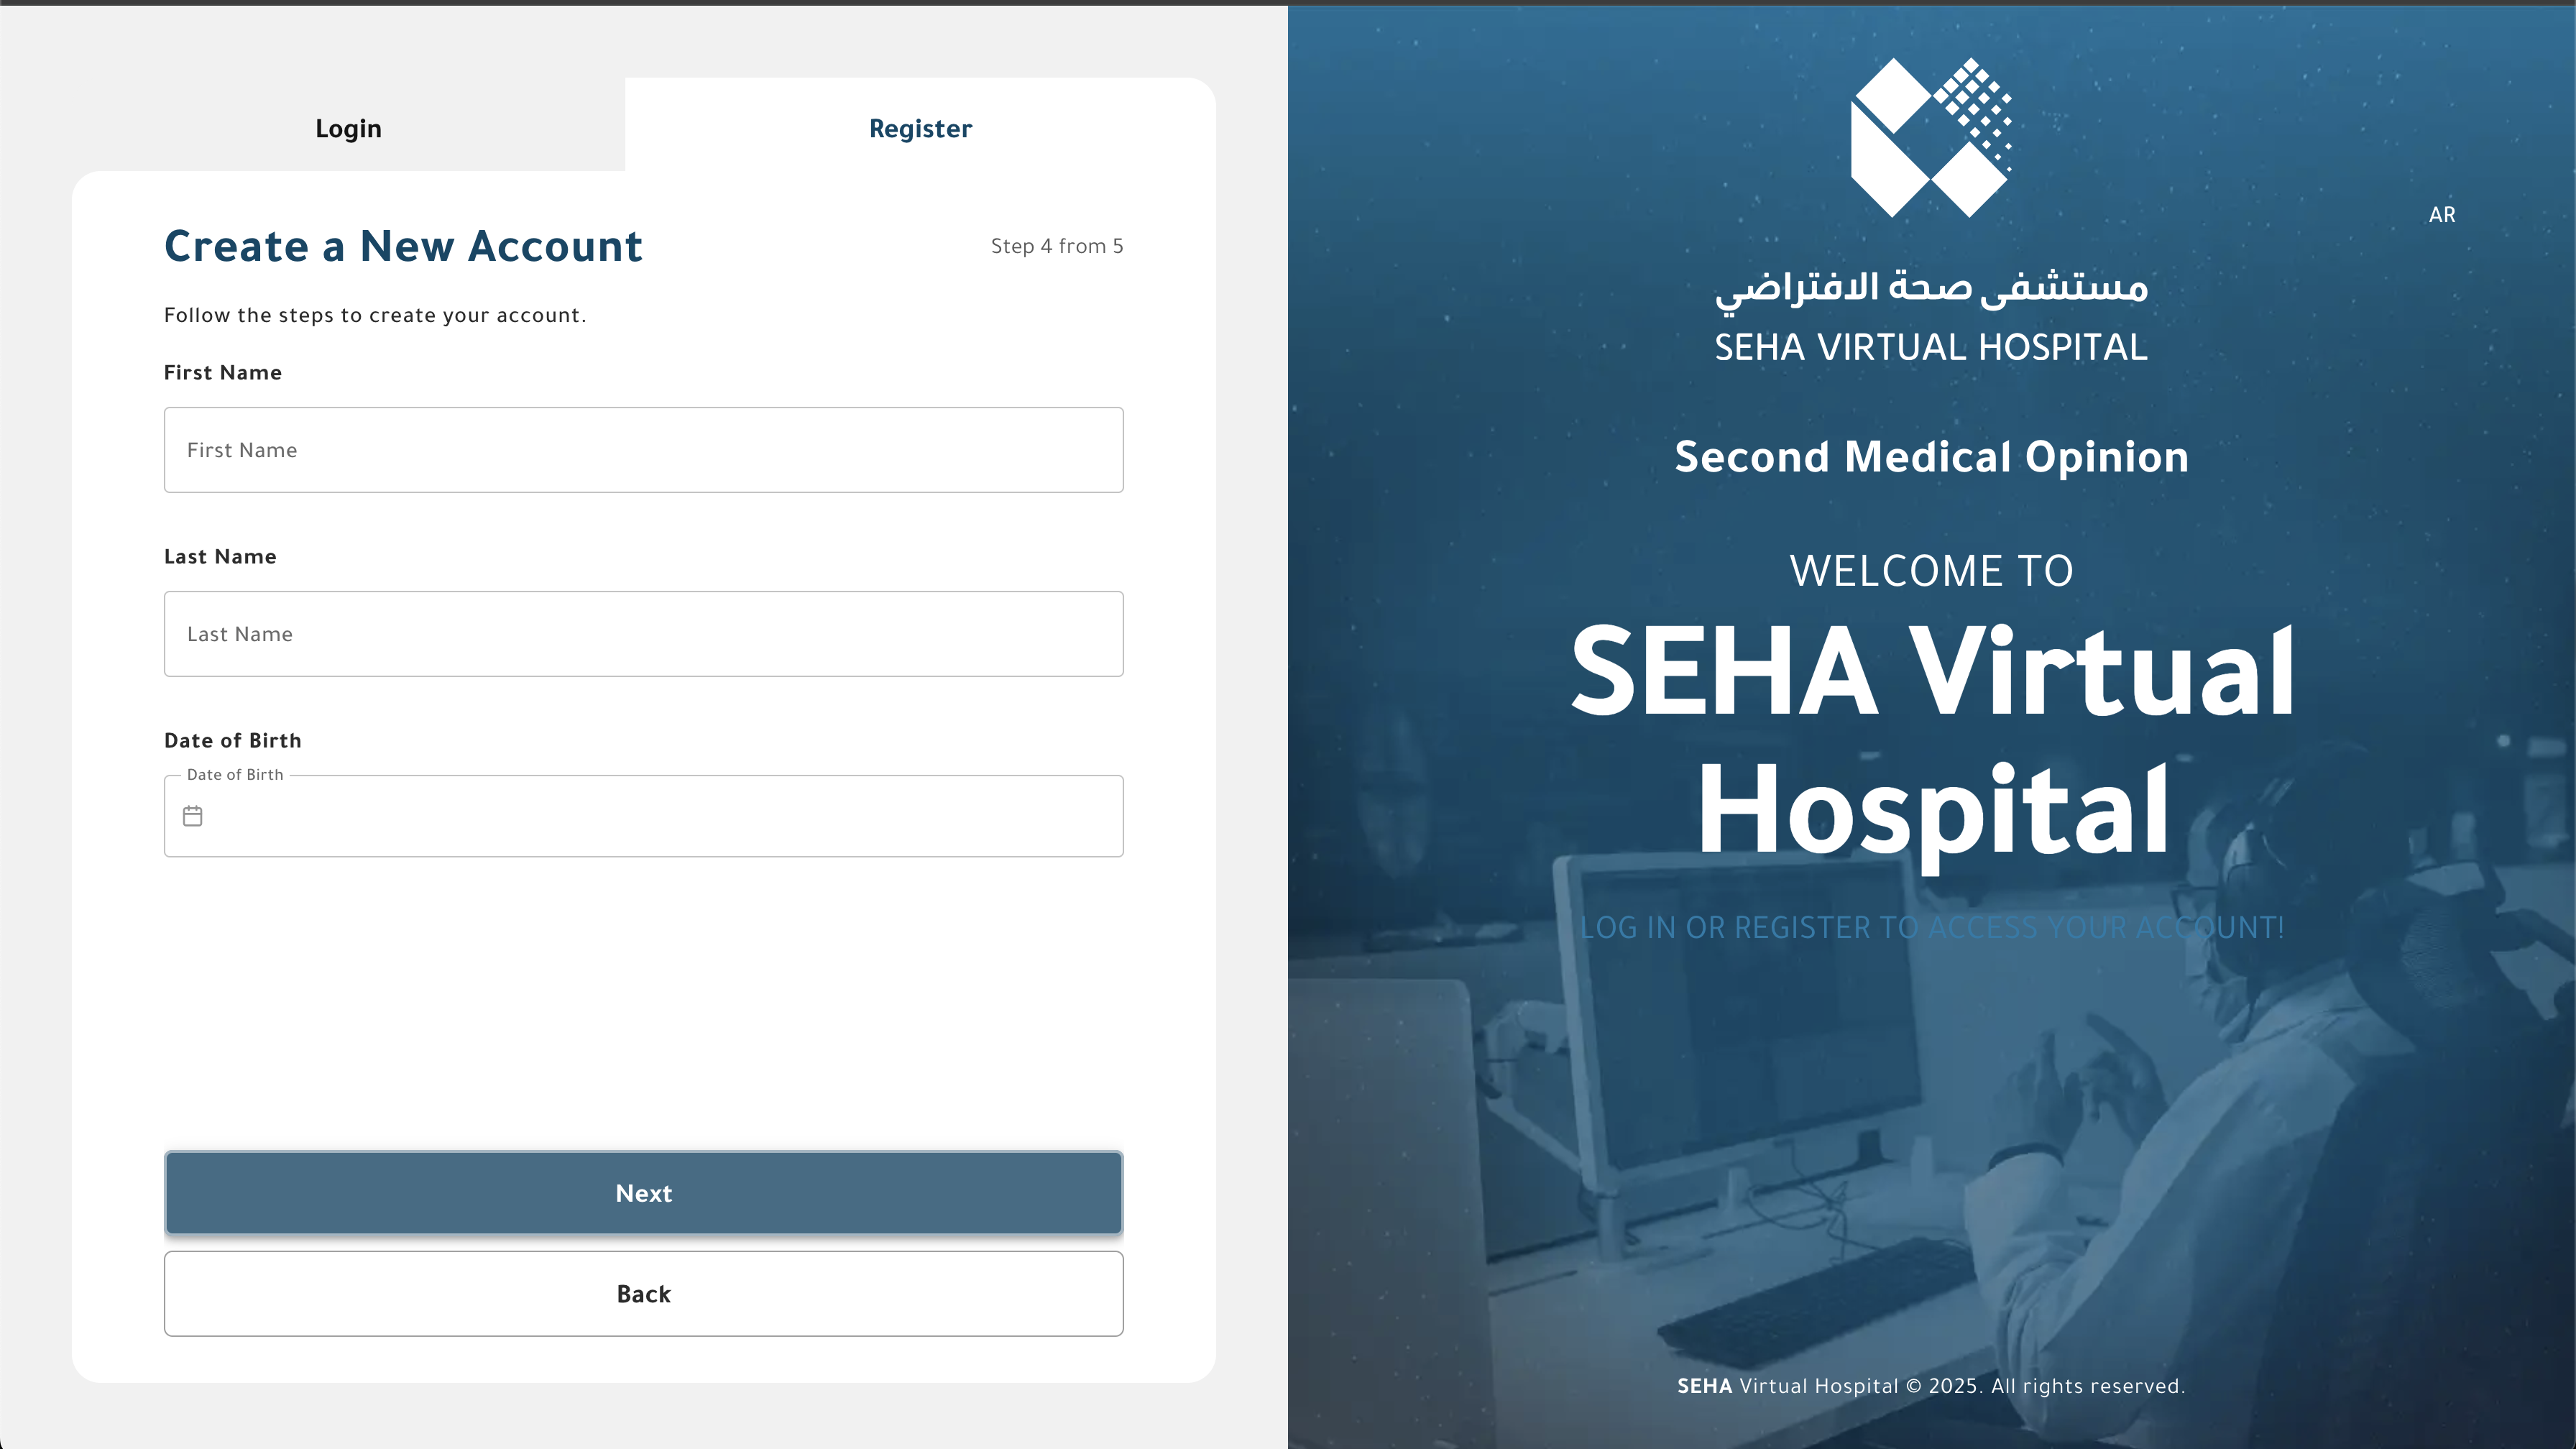
Requester (Coordinator) Account Fields
| Field | Required | Description |
|---|---|---|
| First Name | ✅ | Requester’s first name. |
| Last Name | ✅ | Requester’s last name. |
| Date of Birth | ✅ | Used for profile identification. |
| ✅ | Used as the requester’s username. | |
| Password | ✅ | Must meet password complexity rules. |
| Confirm Password | ✅ | Must match the entered password. |
After completing all fields, click Submit to finalize registration.
Example Interface

Post-Registration and Access
- Once the registration form is successfully submitted:
- The institution account and its associated requester account are created.
- The requester is automatically logged in and redirected to the system dashboard.
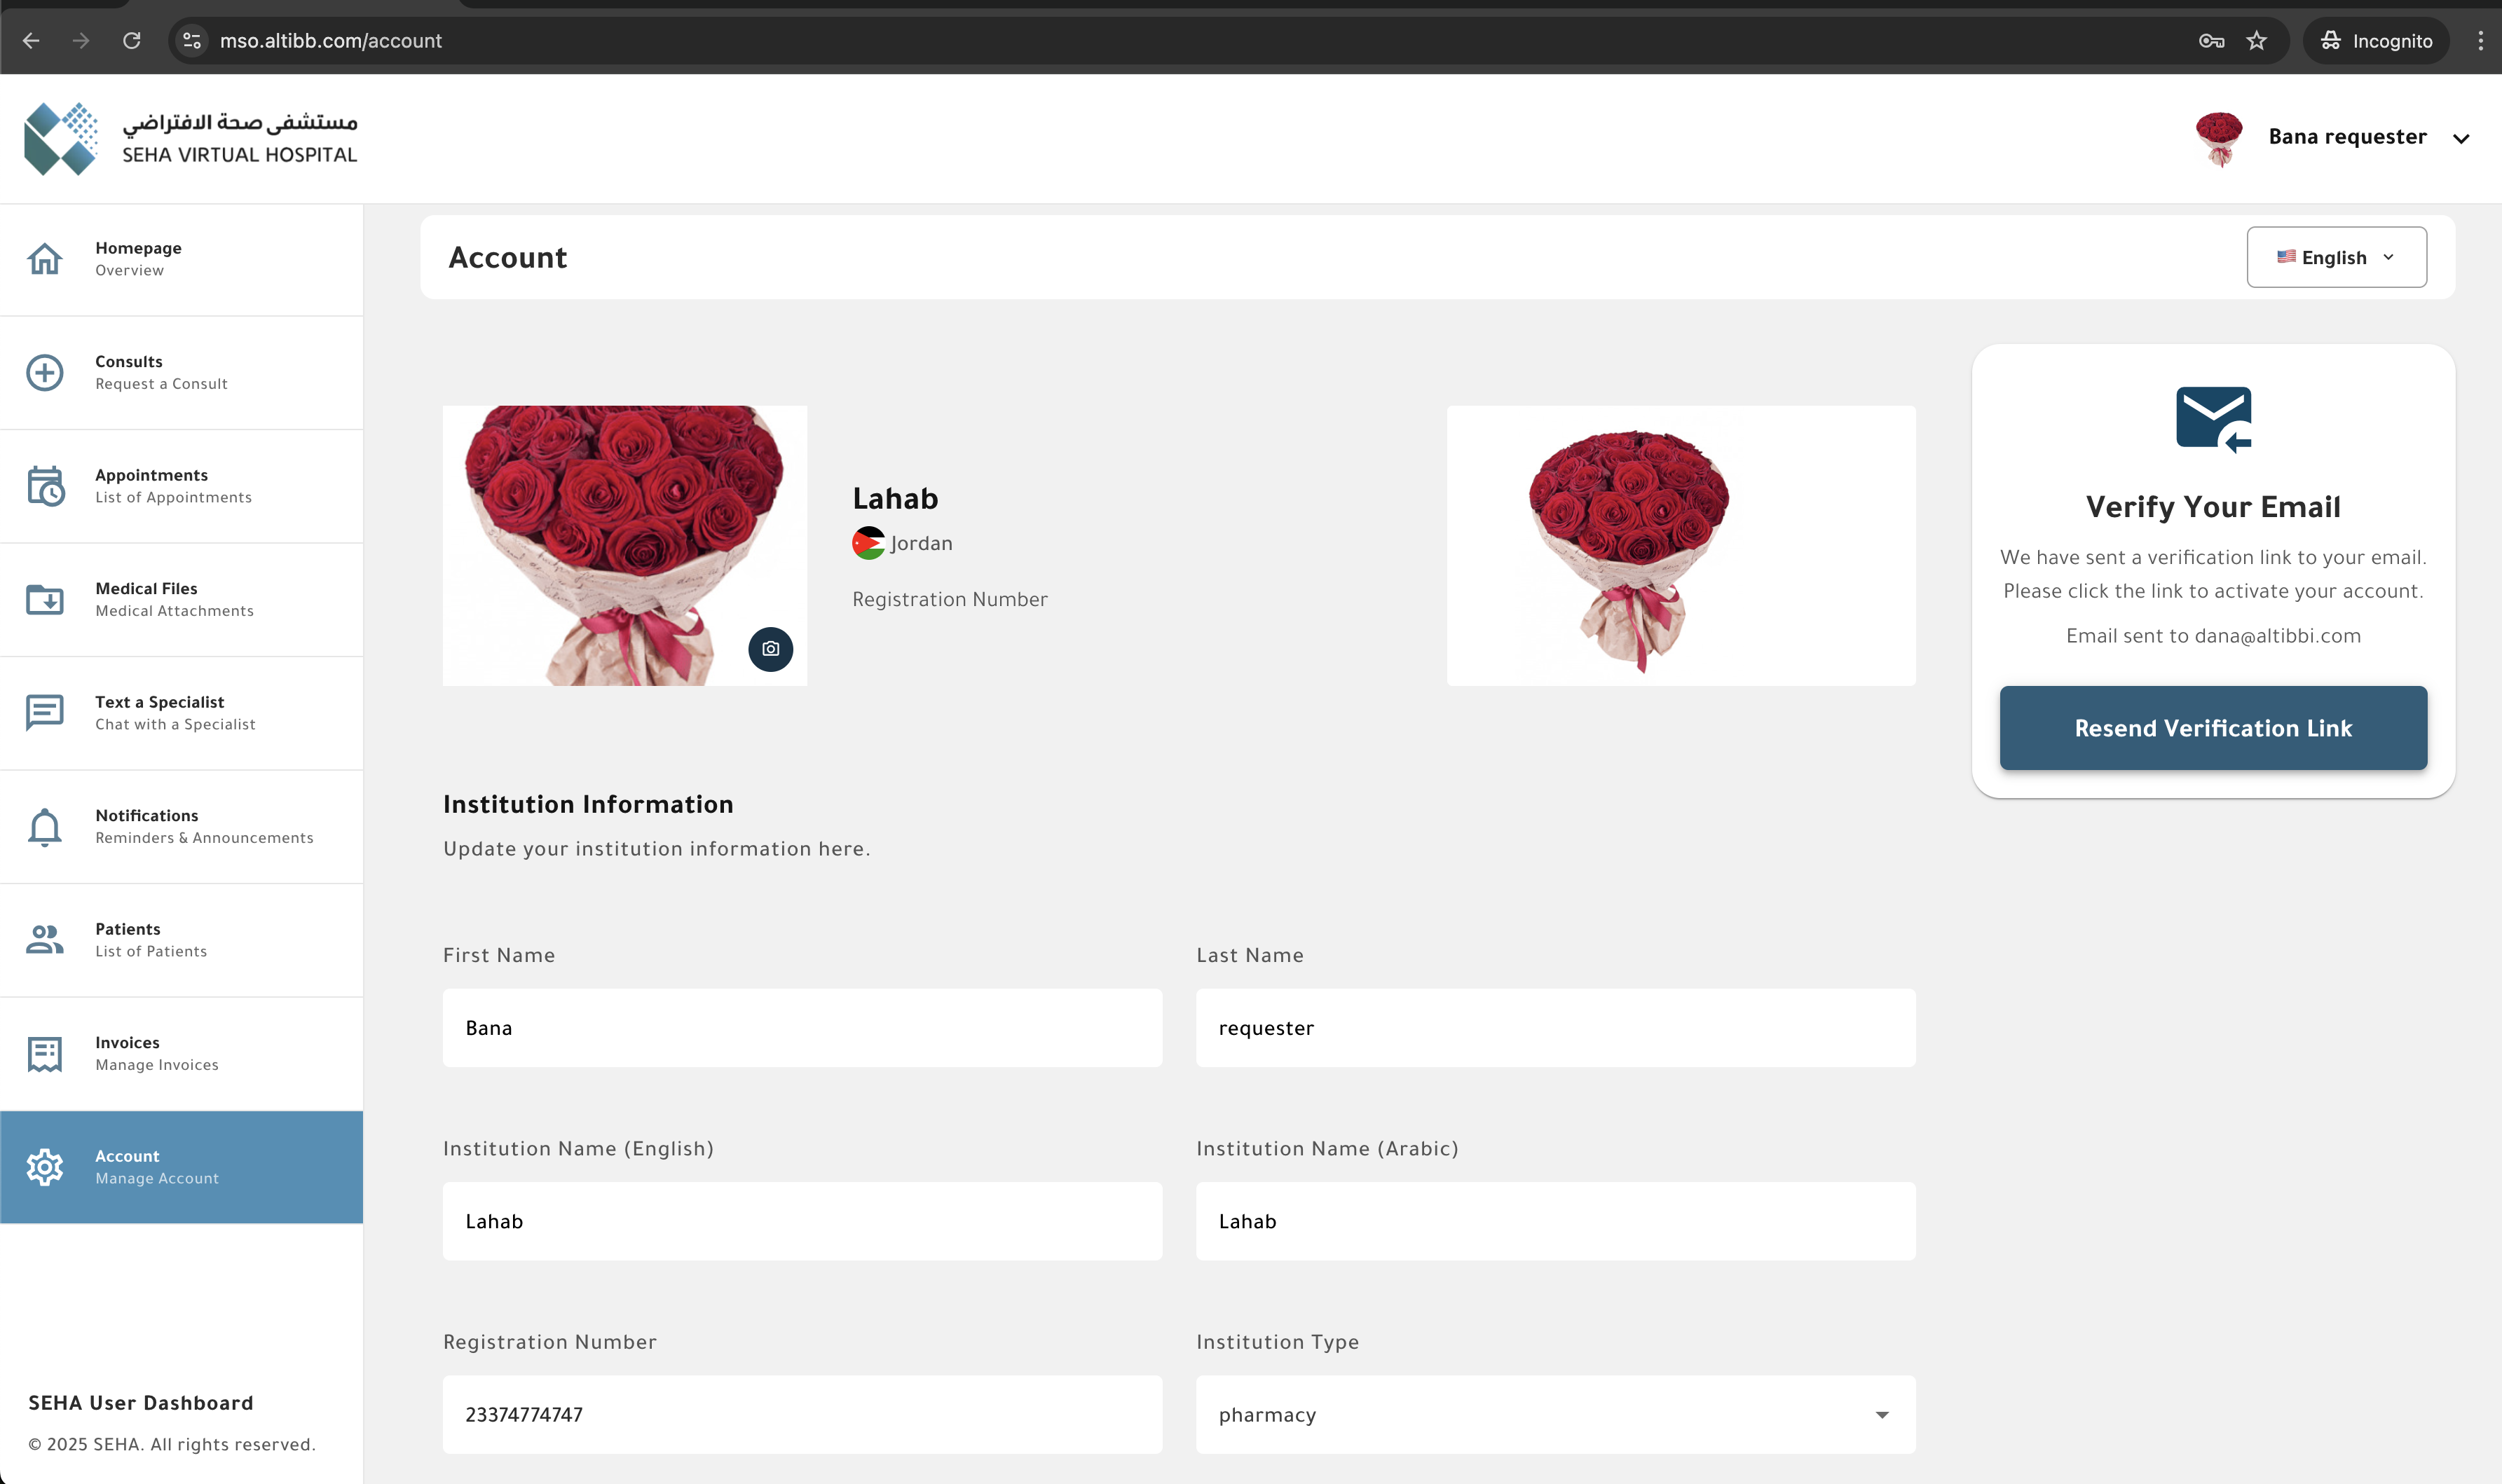
- A verification email is sent to the requester’s registered email address.
- The requester can resend the verification email once if not received.
- If the requester changes their email address, a new verification email will be sent automatically to confirm the updated address.
Institution Account Management
After registration, the requester (institution coordinator) can manage both the institution details and their own user account.
1. Update Institution Logo
- The institution logo can be changed or updated from the institution settings page.
2. Update Institution Information
- Editable details include:
- Institution Names (Arabic and English)
- Registration Number
- Institution Type
- Business Sector
- Phone Number
3. Manage Requester Data
- The requester can update:
- First and Last Names
- Email Address (email verification required after change)
- Date of Birth
4. Change Password
- Requesters can change their password from the profile settings page.
5. Manage Addresses
- Requesters can add one or multiple addresses for the institution.
- Each address includes:
- Country
- City
- Detailed Address
Example Interface


License Validation Note
Currently, license validation via the governmental service API is not yet implemented.
Once the integration with the government verification service is approved and activated, all newly registered institutions will be required to pass automatic license validation before their accounts become active.
Note:
Institution accounts are designed to represent verified healthcare organizations. The linked requester acts as the primary coordinator for all second-opinion case submissions on behalf of the institution.